Sunday, May 28, 2017

I still hate balloons...

  Finally back playing in the mud a little.  I managed to make a few new coffee cups with fun little messages inside and came up with a new idea how to get the words to stand out a little better.  I'll underglaze them before I bisque and that way I can sand off any excess when they are leather hard making the color more distinct.  (keep your fingers crossed this is still just a theoretical fix) So after a good day of turning I had quite a few "word mugs" ready for the test.


The good news is, this idea appears to have worked out quite well...Once bisqued the words came out much darker and more detailed than the mugs I've tried in the past.  Hopefully, this theoretical fix will actually work.  
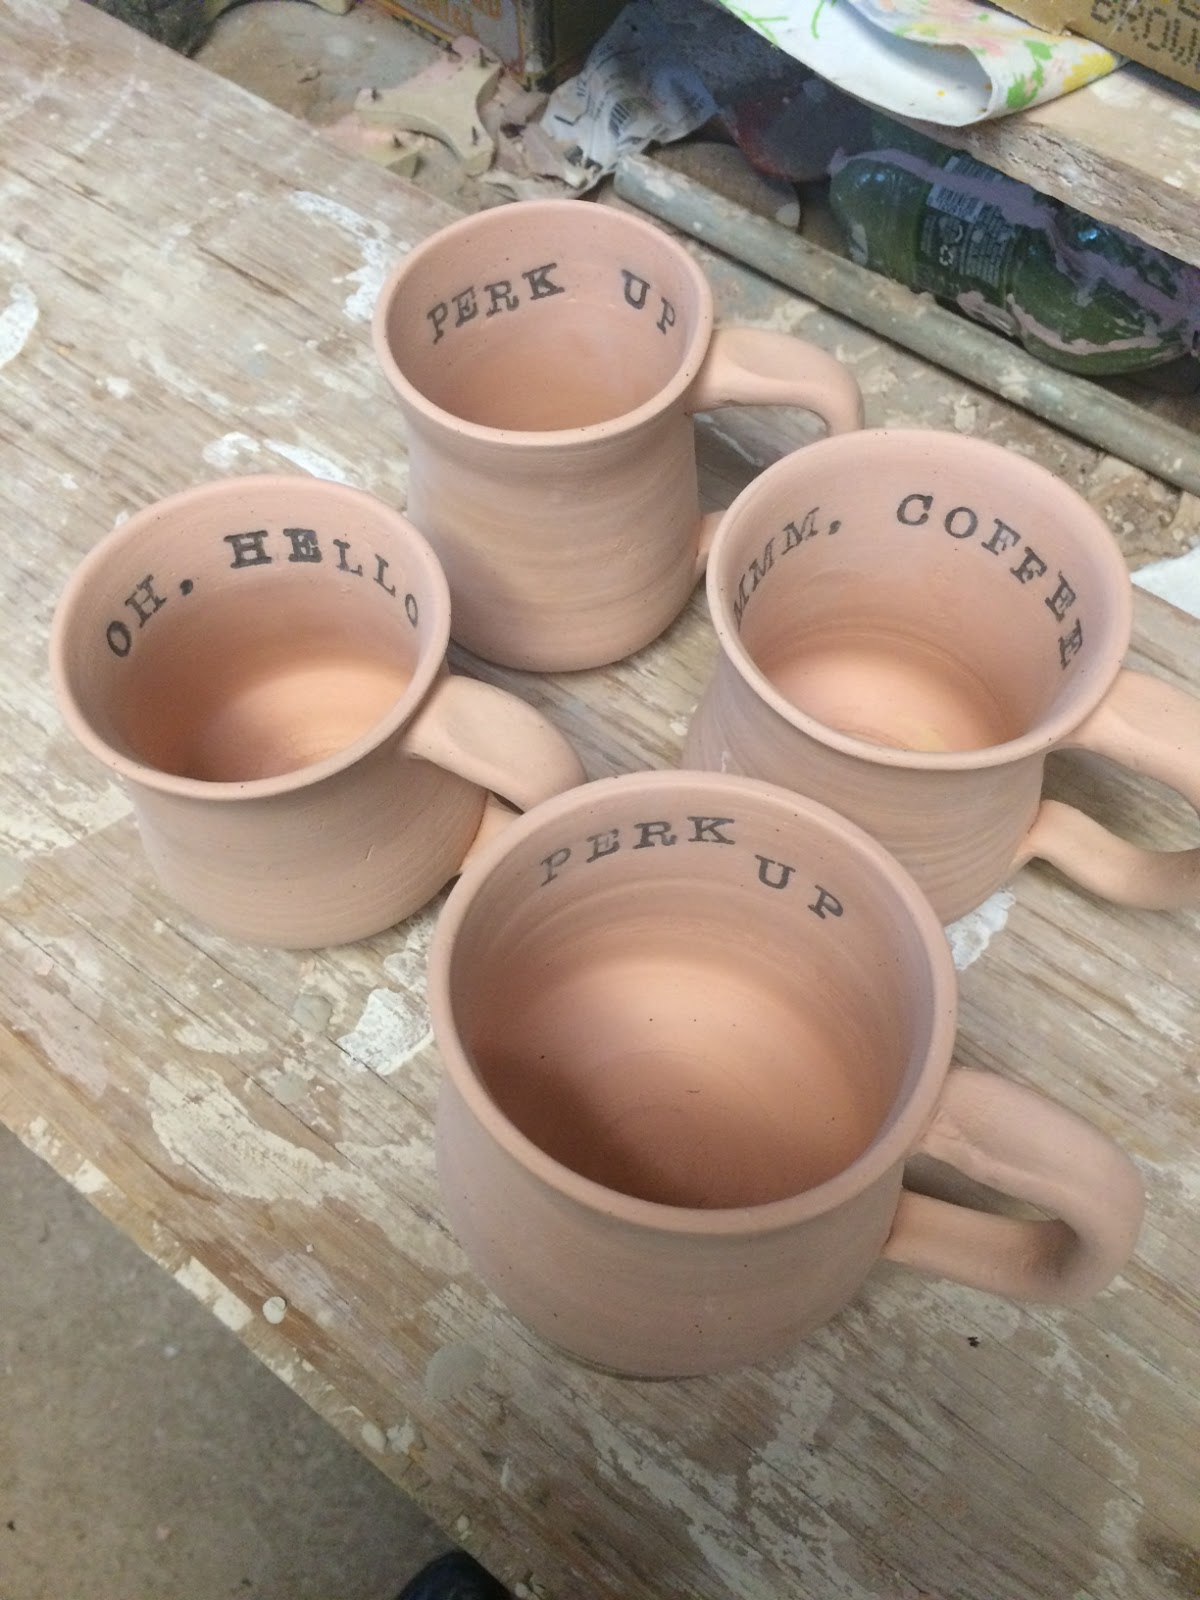
Next step is to figure out how to glaze the insides clear so the words are still visible and manage to glaze the outside in other colors.  I started with the clear interiors...so far so good.  (but the hard part is next) 


So I saw this really cool idea online. (stop laughing, I know you all do that too) In this guy's post he was using a balloon to keep from getting the glaze on the insides of his mugs, a problem I am intimately familiar with when trying to glaze the inside and outside 2 different colors.  

  The joke here is that I really hate balloons...REALLY hate balloons.  When I was a District Manager my store teams used to call and ask where I was going to be on event day because if it was their store then they knew there were NO BALLOONS!

  I had to give it a try...and guess what, it's really awkward, and a little scary, but it works!  Stay tuned to see if these mugs survive their battle with the kiln (the kiln is always the enemy!)


  I don't know that I am quite ready to give up my dipping tongs, but I may have a little less hatred for the balloons after this endeavor...until next time, stay muddy my friends!

Tuesday, September 20, 2016

Lookin for some hot stuff...

  Are you all singing disco tunes yet?  I can't help but do so whenever I start to think about these trivets!  It never fails when we all get together for a Holiday the table fills with wonderful family recipes there isn't enough room for everything and Grandma's antique table inevitably needs to hold the overflow.  (insert shameless Hilton Homeplace Cookbook plug here, available at www.hiltonpottery.com)


Sure you could use a pot holder...but why not a beautiful pottery trivet?  So I set out to make some!  It was a lengthy process, but a lot of fun!  First there have to be molds...


Now we are ready...so let's mix the plaster and be ready to pour...(and I mean ready quick because it sets faster than you can imagine, which I learned the hard way...both figuratively and literally) 


Next you have to peel out the goodies and see what you're left with in the negative space!  


Next comes the fun part...add clay, smooth the backing and use those "rice bags" we made in a previous blog post to ensure they all dry flat...a crooked trivet will do no good. 


Off to the bisque kiln!  


Now for some glaze...and another firing! 


Open up the enemy's lid, and see what we have! (The kiln is the enemy) 


Not too bad!  Now let's repeat this process a few times and get ready for the October 8th Sale!  


Sunday, June 26, 2016

Don't get it twisted...

Ever made something you love only for things to go horribly wrong?  It doesn't have to be pottery...what about that cake you saw on Pinterest?  Or the makeup tutorial on YouTube...We've all had a few #nailedit moments!  (Seriously, if you haven't seen these google the Pinterest "nailed it" photos...when you stop laughing till you cry come back to finish this blog...")  For me the "nailed it" saga stretches far beyond pottery, but when I'm in the shop trying to "nail it" most of the time I blame the Kiln...but THIS one time I will blame Mother Nature. 

When Clay is drying it warps and bends and tries to do anything except stay where you put it when making flat things like trays or tiny little jewelry pieces.  So usually you make flat pieces on rainy days, (or in the south on any day where you walk outside and can't breathe due to the humidity.)  But on occasion one may need things to dry flat on a sunny day.  Well, where there's a need there's usually an invention! (and this is no different) 

So...what can keep flat things flat?  Lay another board on top? Sure, but it could scrape the face of your piece...How about turning it upside down for drying? Sure, unless it has a lip or bend like the edge of a tray. So what will wick out moisture and allow any shape to remain  undamaged? Bags filled with something heavy!  Sand, or bb pellets, or marbles? 

 It should be heavy, but not too heavy...and nothing that could leave marks on the body of the clay...  Rice!  Rice is the magic ingredient!  I can make bags and fill them with rice! ...but how much rice? Well, let's see what they have at the grocery store and start there.  Score!!!! Giant bag just waiting for me...so after the toddler sized 20lb bag of rice was strapped in and safely riding home in my convertible, I got to work.  

First, I made bags from an old cotton sheet...like little pillow cases for my pottery. 


Second, I filled the rice bags with 5-10 lbs of rice!  (No my whole floor isn't covered in rice, the carpet is just the same color...ha!) 


Thirdly, I sewed them shut...and thought hmmm, maybe just for safekeeping lets top stitch around a few of the the edges again for extra rice containment...

Then tried it out!  Worked great!  Large things, small things, detailed things...all things stayed flat and no warping!  


Now if only I could get them glazed and fired as easily...fingers crossed! (The kiln is still the enemy) 

Sunday, June 19, 2016

Going "bat-ty"...

I'm baaaaccckkk!  I know you all thought I had disappeared, but I've just been so busy with the real world I haven't been able to escape to Pottery-land.  Well there is no better time than Father's Day weekend to spend a few days with dad!  

You know those "5 year projects" the ones that don't take more than a day or two but don't get done for 5 years because they keep getting pushed to the bottom of the "to do list" over and over?  Well, check "making new bats" off that list!!! 

Now don't get me wrong, I didn't actually make any bats, dad did all the work...but I documented it for publication...ha!  

Step 1...acquire all the tools found in a professional level machine shop. (men and their power tools...)

Step 2, cut the particle board into squares.  Use saw to cut into circles. 


Step 3, drill pin holes in the exact position to fit the wheel head.  You could measure twice and drill once...or you can use and old bat and clamp it to the new one, and drill through both. 


Step 4, put the freshly drilled bat on the lathe and finish up those edges. Good to go!  


Done-zo!  Wait, no...one last step.  Brand new bats fit really well, which means they wobble a lot less, but they are also harder to pick up.  Problem...solved!  Insert "finger notch" so you can pick it up.  Pretty nifty thinking dad...


So somehow for Father's Day I ended up with all the gifts...but the most precious one is the time with dad.  Happy Father's Day 2016!  Now there really are NO EXCUSES for not making pottery!  (No pressure there, ha!) 


Sunday, December 13, 2015

Pay no attention to the man behind the curtain...

Ok, actually today I have to pay attention to the man behind the curtain because one day the wizard is going to expect me to remember all these things he told me 20 years earlier...

Today started with an early Christmas gift!  Seems like I've heard somewhere you are supposed to give gifts like you'd want yourself...enter the brand new Skutt Kiln. (Thanks dad...I will love it as much as you will!) 


And as with most other visits...dad's obsession with his impending demise and morbidity created an educational visit where I learned how to make the sausages, (so to speak) 

Step #1 - run the scraps of clay through the hammer mill...(engineered for corn, but works well with clay) 


Step #2 - Put the now "powder-like" substance in the giant mixer, along with a baby formula can full of bentonite (it's been a couple of years since I drank bottles, so apparently even 37 year old formula containers are acceptable measuring devices) 


Step #3 - Add water...using an equally specific tool for measurement as step #2, a 5 gallon bucket from Lowe's filled to the middle line of the E stamped on the bucket. (Who am I to judge? If it works...) 


Step #4 - Take heaping handfuls of muddy mess and drop it in the Pug Mill (no puppies were harmed in the making of this clay) 


Step #5 - Extrude it from the pug mill, cut off stacks and bag it.  After a little settling it's ready to go!  


Whew! That's a lot of work, but really cool to be a part of the process.  I didn't get any pots turned today, but managed to also learn how to mix and apply kiln wash to a few new shelves for the new kiln!  (Now I just need a few pieces to fire!) ha!  


I know one day I'll look back on these days and cherish them...because I already enjoy them so much right now.  Love you dad! (and thanks again for the Christmas Kiln!) 

Sunday, September 20, 2015

Feeling Muggy...

  It's the 19th of September, and it is still 89 degrees!  Not to mention there's enough humidity to keep you from breathing!  Speaking of feeling muggy...

  With less than a month till the 12th Annual Hilton Homeplace Sale, this is the last chance I have to make anything...maybe the weather inspired me, maybe it was all the social media requests for coffee mugs with words stamped in them. 


  What's the opposite of a baker's dozen?  Eleven mugs in one day is a pretty big step for me!  They don't look like each other, unless you consider that they all are a little crooked, ha!  It's nice to sit down and things go well, it happens rarely for me.  Dad was making fun of me because I refused to change the "lucky bat" and kept using the pot lifters to move on to the next mug.

  Up next is jewelry time again!  With a box full of parts, let's hope some of them work out!  


Sunday, September 6, 2015

Sometimes you're a baker...

Sometimes you're a baker...rolling out clay like Grandma used to when she made biscuits.  


Sometimes you even have to add a little corn starch so it doesn't stick to everything...


But most often, at least in my case...I'm a carpenter...steel wool is my best friend, and as my father would tell you...it hides a multitude of sins! Ha!  


A little steel wool on the edges of my pieces makes sure there's nothing sharp to grab you...it also covers you and everything around you in dust...(like find it the next day after you've showered kind of covered! Ha!) And it's EVERYWHERE!  No chance of the shop ever being clean.

I joke with dad that if the place burns down we will have the most gorgeous floor ever just in the amount of glaze that has spilled in the floor over the years!  

Well, with only a few weeks left till this year's show I guess I'd better get to sanding! Ha!